Using Mapper II
Mapper is accessed by selecting the Mapper icon on the Toolbar.
Select File then Open from the Mapper toolbar where a list of files are displayed. Mapper Files are identified by the Activity ID. This method only uses the Activity ID.
- Select the import file name (e.g. if importing Award Codes select M000017 followed by OK).
- Use the Browse button to select the corresponding .csv file.
- Select either to Validate Only or Perform Update.
The Validate Only option will validate fields and produce a report on any exceptions without making any changes.
The Perform Update will update the information as well as produce an exception report. - Clear file before importing. This field becomes available for selected files. Care should be taken when selecting these options, as this will clear all the records for the importing file.
- Application Reference. Comments about the import can be added and is displayed on the Connector window under the Reference column. This could be used to differentiate between a Validation only field and an Updated file import.
- Select Run to begin the selection process.
- The result of the validation/update is displayed on the Import Summary window.
- Errors are corrected and the validation can be run again or the import can be updated.
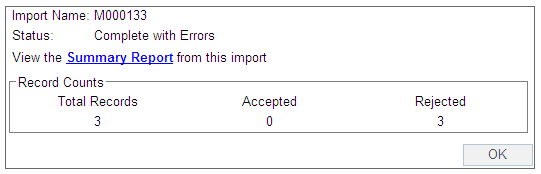
Import Summary
As a result of the import validation or update, the Import Summary message displays showing the following:
- Status of the Import
- Access to the Summary Report if errors were encountered.
- The record count: Total number of records imported/validated, number of accepted records and the number of records rejected.